This article is for content creators, small business owners, social media managers, and everyday users who need to quickly polish photos without learning professional-grade software. If you have been wondering which online photo editor will actually save you time while delivering clean, professional-looking results, you are in the right place. By the end of this guide, you will know exactly what features to look for, how the most widely used tools compare, and which option is most likely to fit the way you actually work. Whether you need to strip backgrounds from product photos, fix exposure issues, or prepare images for social media, this breakdown covers everything you need to make a confident decision.
Why Online Photo Editors Have Become the Default Choice
Not long ago, polishing a photo meant opening a desktop application, navigating a complex interface, and spending time you probably did not have. Online photo editors changed that equation significantly. They run in a browser or mobile app, require no installation or licensing fees to get started, and increasingly include artificial intelligence tools that do the heavy lifting for you.
The market has grown crowded, though. Nearly every major design platform now offers some version of background removal and image enhancement, and their feature sets are starting to overlap. That overlap makes comparison harder, not easier. Two tools might both advertise “AI-powered background removal,” but the quality, speed, and flexibility of each can differ widely depending on the photo complexity, the subject matter, and what you plan to do with the image afterward.
Understanding how to evaluate these tools on criteria that actually matter to your use case is more valuable than a simple ranked list. The following sections walk through the most important factors to examine before committing to any one platform.
The 10 Criteria That Separate Good Online Photo Editors From Great Ones
1. Background Removal Quality on Complex Images
One-click background removal is now a standard feature, but not all implementations are equal. The real test is how a tool handles difficult subjects: flyaway hair, semi-transparent fabrics, furry animals, or subjects photographed against busy or textured backgrounds. A tool that performs well on a clean product shot against white may produce ragged edges on a portrait taken outdoors. Before settling on a platform, test it with the actual type of images you edit most often.
Look for tools that not only remove the background automatically but also allow you to manually refine the edges afterward. Precision controls like edge smoothing, brush-based touch-up, and the ability to toggle specific areas on or off separate professional-grade tools from basic ones. Transparent PNG export is also essential if you plan to layer the subject onto new backgrounds.
2. Image Enhancement Controls and Their Flexibility
Auto-enhance buttons are convenient, but they are not always accurate. A good online editor will offer both a one-click enhancement option and manual sliders for brightness, contrast, saturation, warmth, highlights, shadows, and sharpness. The combination of both options gives you the speed of automation with the control to fix anything the algorithm gets wrong.
Pay close attention to how intuitive the slider interface is. Some platforms bury these controls under multiple menus, which defeats the purpose of a quick editing workflow. The best tools surface these adjustments clearly, allow real-time previewing as you drag sliders, and let you compare before and after states without extra steps.
3. AI-Powered Object Removal and Generative Fill
Background removal is only part of the conversation. The more powerful capability is the ability to remove specific objects within a photo, such as photobombers, distracting signage, or clutter in the background, without leaving a visible patch behind. Tools powered by generative AI can intelligently fill in the removed area based on the surrounding pixels, producing results that look natural rather than edited.
This feature is particularly useful for product photography and real estate images where an otherwise strong photo is compromised by a single distracting element. When evaluating tools, check whether object removal is available on the free tier or requires a paid plan, and whether the results hold up on complex backgrounds.
4. Speed of Processing and Interface Responsiveness
Time matters. If a background removal tool takes 30 seconds per image and you are processing a batch of product photos, the cumulative delay becomes a real problem. Look for tools that process standard photos in under five seconds and do not require you to wait through loading screens between edits.
Interface responsiveness matters too. Lagging sliders, delayed previews, or frequent auto-save interruptions all slow down your workflow in ways that add up over time. User reviews are often a reliable indicator here, since performance issues that are not obvious in a demo become apparent with repeated daily use.
5. Integration With Design Templates and Export Options
Many online editors are not just photo tools; they are part of broader design ecosystems. This can be a significant advantage if you regularly turn edited photos into social media posts, flyers, presentations, or marketing materials. Rather than editing a photo and then importing it into a separate design tool, you can move directly from enhancement to layout within the same platform.
Check what file formats are supported for export, particularly PNG for transparent-background images, and whether the output quality is sufficient for print as well as digital use. Also consider whether the platform’s template library is relevant to the type of content you create most often.
6. Availability and Functionality of the Free Plan
Most platforms in this category offer a free tier, but the meaningful question is how much of the actual workflow is accessible without paying. Some tools offer free background removal but place a watermark on the exported image. Others limit the number of AI-powered edits per month. A few require account creation just to access basic functions.
Before investing time learning a platform’s interface, verify exactly what the free plan includes and whether the limitations would affect your typical workload. For occasional personal use, a limited free plan may be perfectly sufficient. For regular business use, a premium plan may be worth the cost if it removes friction at critical points in your editing process.
7. Mobile App Quality and Cross-Platform Consistency
Photo editing increasingly happens on phones, particularly for social media content. An online editor that works well in a desktop browser but delivers a degraded mobile experience effectively cuts off a major part of your workflow. Look for platforms with dedicated iOS and Android apps, not just mobile-optimized web versions, and check whether the key features including background removal and manual enhancements are available on mobile as well as desktop.
Equally important is cross-platform consistency. If you start a project on your desktop and want to continue it on your phone, the platform should sync your work seamlessly. Projects that get stuck in one format or are only accessible from one device add unnecessary friction to your editing process.
8. Sharpening and Blur Correction Tools
Not every photo needs a background removed, but nearly every photo can benefit from some degree of sharpening or blur correction. This is especially true for photos taken on older smartphones, in low-light conditions, or at a slight angle that resulted in soft focus. A dedicated sharpening slider, ideally separate from general contrast adjustments, is an important tool for recovering usable detail from imperfect source images.
Some platforms go further and offer unblur or deblur tools that use AI to recover clarity in out-of-focus shots. The results vary depending on how much blur is present, but even partial recovery can mean the difference between a usable photo and a discarded one.
9. Filters and Aesthetic Presets
Speed matters for certain types of content creation, and pre-built filters offer a way to establish a consistent visual style without manually adjusting multiple sliders each time. Look for platforms that offer a range of aesthetic presets, from natural and subtle to bold and stylized, and allow you to fine-tune the intensity of any applied filter rather than applying it at full strength.
For social media content creators in particular, the ability to apply a consistent filter across a set of photos is valuable for maintaining a cohesive visual identity across a feed or portfolio.
10. Privacy Handling and Data Policy
When you upload personal or business photos to an online platform, you are sharing that data with a third party. Before committing to any tool, review its privacy policy to understand how uploaded images are stored, whether they are used to train AI models, how long they are retained, and whether they can be shared with affiliates or advertising partners.
For business use, this is not a minor concern. Product photos, portraits of clients, or proprietary visual assets all carry different levels of sensitivity. Tools from established software companies with clear data governance policies generally offer more assurance than newer or less transparent platforms.
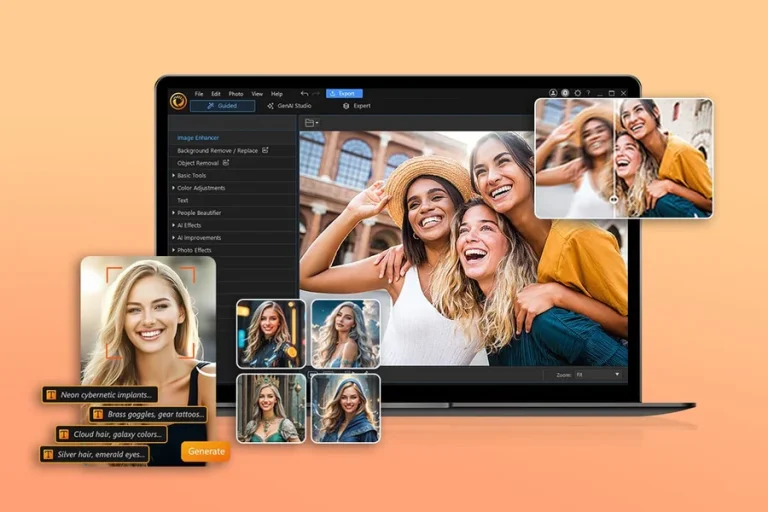
A Closer Look at Adobe Express as One Strong Option
For users who want speed, polish, and flexibility within a single platform, Adobe Express’s photo enhancer free is worth serious consideration. It is built for non-designers and content creators who need professional-quality results without a steep learning curve.
Three features stand out as genuine differentiators. First, the background removal tool handles complex backgrounds accurately and allows further editing within the same workspace, meaning you do not have to export the image and open it in a separate application to change or add a background. Second, the generative AI capabilities, powered by Adobe Firefly, allow you to add or remove specific objects within a photo using natural-language prompts, a level of AI-assisted editing that goes beyond what most one-click tools offer. Third, the integration with Adobe’s broader design ecosystem means that an enhanced photo can be turned directly into a finished social media post, flyer, or presentation using thousands of customizable templates without leaving the platform.
The free plan includes core editing tools, limited generative credits, and access to Adobe Stock images, making it functional enough for casual users to get real work done before upgrading. The mobile app for iOS and Android brings the same core toolkit to phone-based editing with synchronized project access across devices.
FAQ
What is the difference between background removal and background replacement, and do most tools offer both?
Background removal is the process of isolating the subject of a photo and deleting the background layer, leaving a transparent or neutral field behind. Background replacement goes one step further by allowing you to substitute that empty field with a new image, color, pattern, or AI-generated scene. Most capable online photo editors now include both as part of the same workflow, allowing you to remove and replace within a single session. However, the quality of the replacement, particularly whether it handles lighting consistency and edge blending, varies significantly between tools. If background replacement is a core part of your use case, test the end-to-end workflow rather than just the removal step. For photo-heavy workflows involving large batches of images, a tool like Cloudinary can be useful for automating image transformations at scale, including background handling, without manual editing.
Is AI-enhanced editing actually better than manual editing for most users?
For users without formal photo editing experience, AI enhancement typically produces better results faster than manual adjustment. The algorithms in modern tools are trained on millions of images and can make intelligent decisions about optimal exposure, contrast, and color balance that a first-time user would struggle to replicate manually. That said, AI auto-enhance is not always accurate, particularly for photos with unusual lighting conditions, strong color casts, or intentional stylistic choices that the algorithm might “correct” away. The best tools offer AI as a starting point and give users the manual controls to refine the result. If you are working with a consistent style guide or need precise color accuracy for product photography, plan to use AI enhancements as a first pass rather than a final step.
Can online photo editors handle high-resolution images without losing quality?
Most reputable online photo editors maintain the resolution of your source image during editing and export at the same dimensions unless you deliberately resize the image. However, file size limits are a real constraint worth checking before you rely on any platform. Some free-tier plans cap uploads at a certain file size, which can exclude high-resolution RAW files or large TIFF exports. Additionally, certain output formats, particularly JPEG, use lossy compression that reduces file size by discarding some image data, which can slightly reduce quality at high compression ratios. For the highest output quality, export as PNG when transparency is needed or as a high-quality JPEG when file size is not a concern.
How do I know if an online photo editor is safe to use for business photos?
Start with the platform’s privacy policy and terms of service, specifically the sections about data ownership, image storage duration, and whether uploaded content is used for AI training. Tools from major software vendors tend to have more formal and comprehensive data governance policies, but this is not universally true. Look for clear statements that you retain ownership of your uploaded images and that the platform does not claim rights to use them for purposes beyond providing the service. For particularly sensitive assets, consider whether the tool offers an enterprise or business-tier plan with additional data protection provisions. When in doubt, watermark test images before uploading originals, and avoid uploading photos that contain confidential personal information.
What should I look for if I need to edit photos consistently across a large team?
Team-based editing workflows require features that go beyond individual use. Look for platforms that support shared workspaces or organization-level accounts where multiple users can access the same project library, brand kit, and template set. Brand kits, which store approved colors, fonts, and logos, are especially valuable for maintaining consistency across a team without requiring each member to manually replicate brand settings in every project. Collaboration features like commenting, version history, and role-based permissions further reduce errors and rework. Many platforms price their team plans per seat, so calculate the cost per user before committing. A project management tool like Asana can complement a photo editing workflow by keeping track of which assets are in progress, approved, or ready for publication, particularly when multiple reviewers are involved.
Conclusion
Online photo editors have matured rapidly, and the best ones now handle background removal, image enhancement, and content creation in a single integrated workflow that genuinely saves time without requiring design expertise. The key is knowing which criteria matter most for your specific use case. If you edit large volumes of product photos, AI precision and batch-friendly performance should be your top priorities. If you create social media content, template integration and mobile accessibility will likely determine how much value you actually get from a platform day to day.
Adobe Express is a capable and well-rounded option worth testing, particularly if you value a clean interface, generative AI tools, and the ability to move from photo editing directly into finished design layouts. Whichever tool you choose, start with the free tier and run it through your real workflow before upgrading. The editor that performs best on the images you actually shoot, for the use cases you actually have, is always the right choice.